
Rivet and Related Detailing
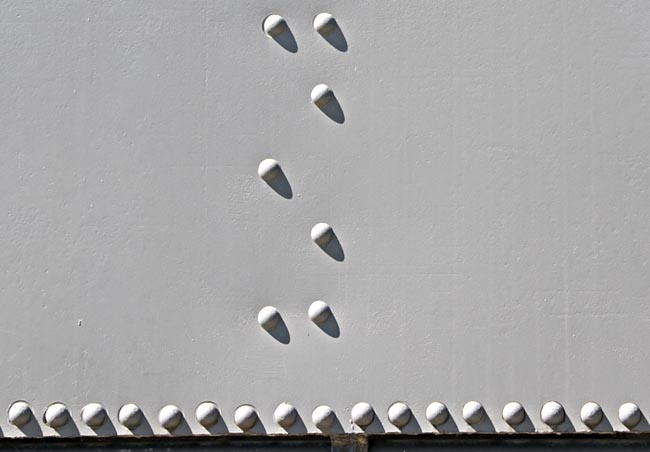
The subject of modeled rivets is commonly discussed by hobbyists, but it is usually in terms of 'rivet counting' referring to the concept of overall modeling accuracy. The purpose of this page is to explain the two types of rivet detailing utilized in O scale modeling and to illustrate the differences. The two rivet types used are 'etched' and 'punched', the names imply the creative processes used to create each type. Shown immediately below is a typical example of prototypical riveting that builders endeavor to recreate in miniature using one of these two mentioned processes. Lets consider in more detail how each process works.
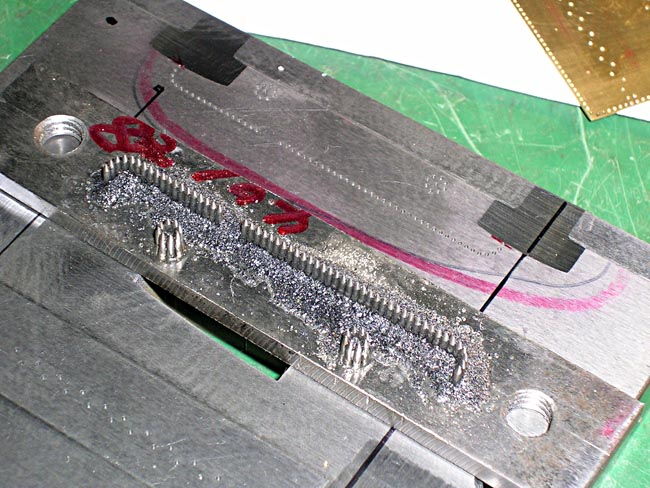
'Etched' rivets are achieved by using an acid solution to remove a uniform thin layer of material from a metal sheet (typically brass) in a controlled pattern. Areas that are to be left 'raised' to simulate rivets are protected by using a light sensitive chemical wash which is activated by projecting a strong light through a negative film to create the intended masking pattern that is acid resistant. Once the metal sheet is washed to stop the acid etching process and to remove the masking agent, the raised areas of metal protected by the masking agent are left to simulate rivets. High resolution negative films and precise timing are critical factors in this process. The etched rivet process is favored by many builders and importers, because it is fast and does not require hard tooling, which translates to less expense. 'Punched' rivets are created by using a two-part die set. A male die with precisely placed pins is placed on one side of a metal sheet and the matching female die with openings to accept the pins on the other. The photo below shows such a die set.
The dies are forced together under heavy pressure to shape the metal in between creating raised 'dimples' in a precise pattern. The female die determines the size or height of each resulting rivet based on the depth of the opening receiving the 'punch' pin.
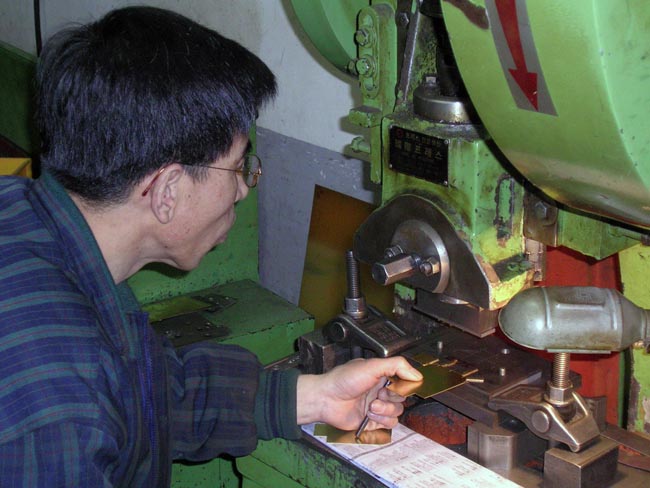
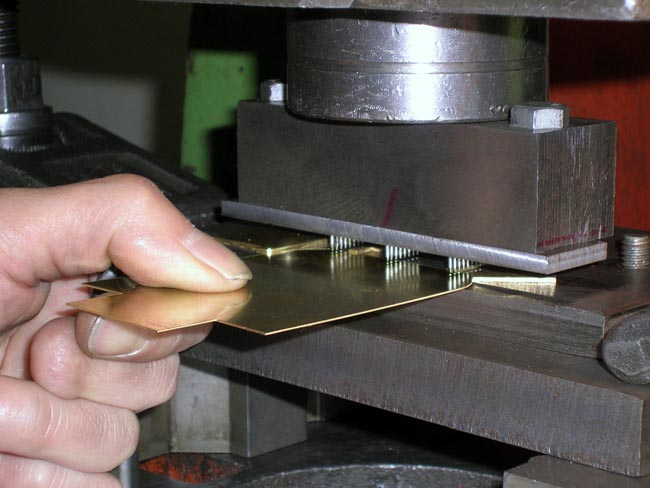
The photo below is a closer look at the setup used to 'jig' the parts to be punched into position. This has to be uniformly repeatable operation so each part for every model is uniform in finished specifications.
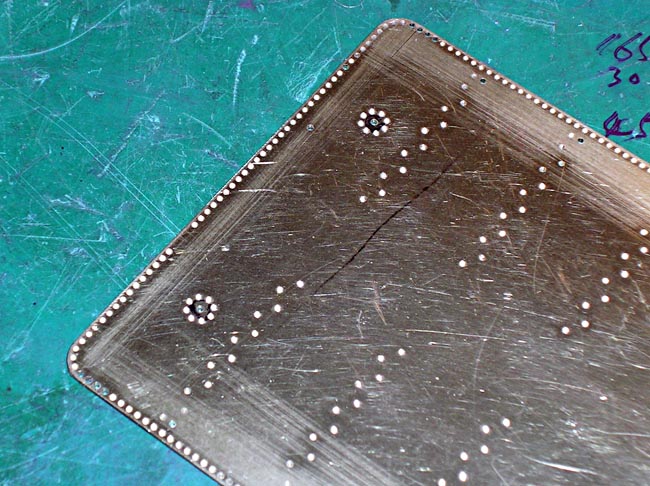
Too much pressure or improperly matched dies can result in a series of holes through the metal sheet. In the photo below, if you look at the corner 'punches' you will see holes instead of dimples, this indicates that the male and female dies were not correctly justified. This is a very time consuming operation that is required to make certain that the rivet pattern is uniform across the panel to be punched, it often requires adjusting individual pins and on some dies there can be hundreds of them to consider.
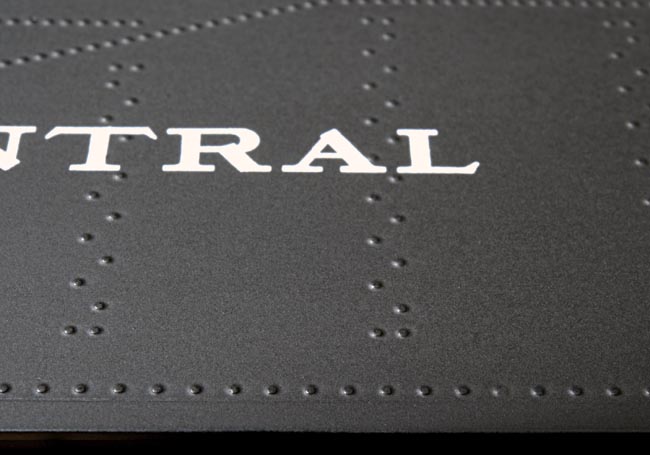
The primary advantage of this process is that the rivet heads are the correct shape and the proper amount of relief (height of rivet heads) can be achieved with great affect. The down side of this process is the cost and additional time required to build hard tooling for each unique part that requires rivet detail. For the part shown above, there are multiple die sets required to detail the entire panel. Additionally, most builders are not capable of building the tooling required to produce punched rivets. The photo below shows a pattern of 'etched' rivets on the side of a tender tank, the most common application for rivet detail. The failing of etched rivets is that they are not the correct shape, they are flat headed rather than the correct raised round head. It is also difficult and at times not posssible to attain the correct amount of relief (rivet height), because removing too much metal using the acid etch process will permently distort the sheet of metal. The sample used for this photo has 'optimized' etched rivets, this means that the metal sheet was burnished with an abrasive material to slightly smooth the sharp edges of the rivet heads prior to painting. Although optimized, you can still see the flat head on each rivet.
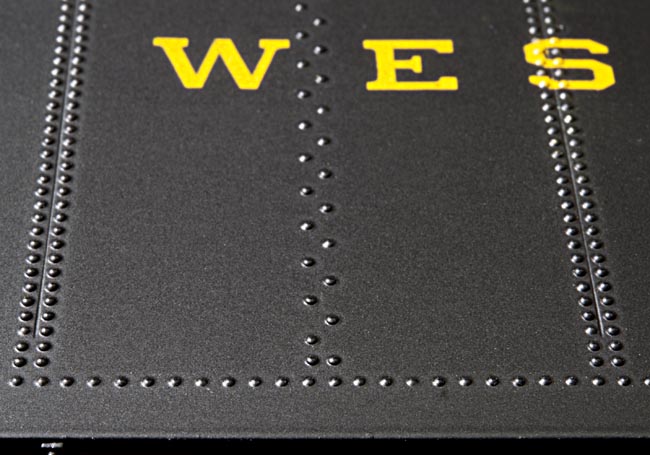
The photo below shows a pattern of 'punched' rivets. Notice the more prototypical shape of the rivet heads and also the degree to which they stand out. The size (diameter) of the rivets on both samples, above and below, is the same. With their rounded heads the ability to reflect light is greater so the rivet modeling affect is much more successful.
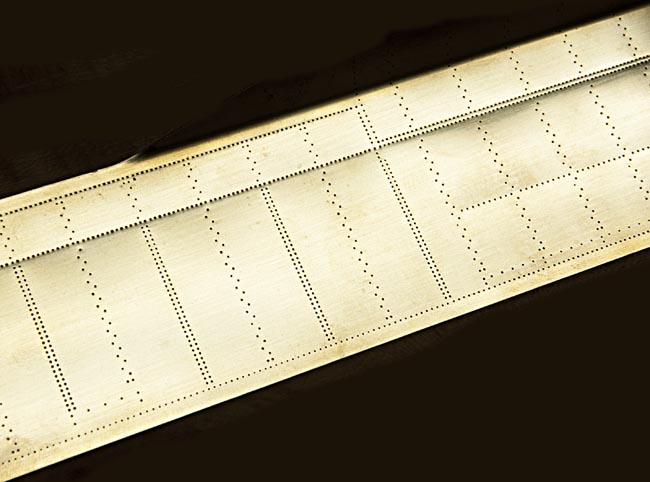
The 'character' of the riveted panels is a by product of the rivet creation process, in the case of etched rivets, the end result is a perfectly flat panel with a pattern of simulated rivets. The added benefit of the punched rivet process is a panel with a 'character' very similar to a prototypically riveted collection of panels, specifically, the panel has stress lines in regular patterns adjacent to the rows of rivets. In the photo below note the subtle irregular flatness of the panel generated by the punching process. The photo is of the backside of a punched panel which better shows this difficult to photograph characteristic. When viewed first hand, the stress lines simulate the affect that the prototypical inside structure of a tender tank has on the prototypical sheeting, shallow hollows between ribs and ridges in line with rows of rivets where they would be secured to the inside structure. This is a characteristic impossible to achieve with etched rivet panels.
A final consideration when thinking about rivet detail is size and how the correct size should be determined. If you have ever read a prototype builders blueprint I'm sure that you have noticed that rivet sizes are specified as part of the build criteria, but how does this specified size relate to modeling the same prototype? When a size is specified it is typical a fractional dimension (1/4", 3/8", etc) and many modelers believe this to be the rivet head diameter, but it is not. The dimension given is the diameter of the rivet shank, the part of the rivet that passes through the metal sheets to be held together. In addition, the type of head that the rivet should have is also specified with 'round-head' being the most common, 'flat-head' and 'countersunk' are two more common types used on prototypes. To determine the correct size to use when modeling rivet heads, a rivet manufacturers specifications must be researched. It should be also noted that the typical sizes can vary from one builder to the next depending on suppliers used in the prototype construction. When evaluating a model, the rivet detailing should certainly be a strong criteria in considering it's value. Whichever process was utilized by the builder/importer can be a strong indicator of what the build philosophy was, 'only the best' or 'good enough'. Copyright © 1997- 2024 Kohs & Company Inc, All Rights Reserved |
![]()
MODEL CONSTRUCTION